At selv lave surdejsbrød er det nye sort, og det lader til at de fleste surdejsbagere virkelig gerne vil lave surdejsbrød med høj hydrering for at få den eftertragtede åbne krumme. Problemet er at når du øger hydreringen så ender du med hvad der føles som en pandekagedej. Du kan selvfølgelig tilføje mere fuldkornsmel, men så kan det være svært at opnå en glutenstyrke så brødet kan stå op selv. Svaret på problemet er at bruge en tangzhong. Dette er min surdejsbrød med høj hydrering opskrift.
For at lave dette brød skal du bruge en surdej. Hvis du ikke har en kan du følge min opskrift og guide. Det er super nemt.
Dette brød er meget nemmere at lave en surdejsbrød med høj hydrering normalt er, men det er ikke et begynderbrød.
Hvis du lige er startet med at bage surdejsbrød vil jeg anbefale dig at læse min artikel ‘Surdejsbrød for begyndere‘ som forklarer alle teknikkerne og hvad du skal vide for at få en god start i surdejsverdenen.
Hvis du bare er her for at få opskriften, kan du trykke på knappen nedenunder og du vil automagisk blive transporteret til opskriften:
Gå til opskriftHvad er en tangzhong?
Videnskabsalert! Denne sektion indeholder noget ret teknisk og videnskabeligt. Hvis det ikke er for dig så hop til næste store afsnit.
En roux eller melbolle er normalt lige dele mel og fedt som bliver stegt sammen og som så bliver brugt som en hjælp til at fortykke f.eks. en sovs.
En tangzhong er en roux lavet med mel og vand som normalt er i forholdet 1 del mel til 5 dele vand.
Hvor kommer den fra?
Tangzhong metoden stammer fra Japan med blev gjort populær af den kinesiske forfatter Yvonne Chen i 1990’erne med hendes bog The 65° Bread Doctor.
Bogen blev aldrig oversat til engelsk, men metoden er siden blevet meget populær verden over.
Hvordan laver du så en tangzhong?
Efter man har blandet vand og mel varmer man blandingen op til 65°. Dette laver stivelsen i melet om til en gelé.
Dette hjælper med at indkapsle væsken i stivelsesmolekylerne.
Harold McGee skiver i hans fantastiske On food and cooking:
During the baking of bread and cakes, the starch granules absorb water, swell, and set to form the rigid bulk of the walls that surround the bubbles of carbon dioxide. At the same time their swollen rigidity stops the expansion of the bubbles and so forces the water vapor inside to pop the bubbles and escape, turning the foam of separate bubbles into a continuous spongy network of connected holes. If this didn’t happen, then at the end of baking the cooling water vapor would contract and cause the bread or cake to collapse.
Formlen på denne surdejsbrød med høj hydrering opskrift
Fordejen er lavet med halvt højprotein mel og halv fuldkornshvede for lidt ekstra hævekraft under fermenteringen så du kan bage lidt tidligere.
Fordejen er omkring 20%. Hvis du laver dette brød når det er varmt bør du nok sænke mængden, hvis det er rigtig koldt i dit køkken bør du hæve mængden.
| Vægt | Ingrediens | Bagerens procent |
|---|---|---|
| 34g | surdej (100% hydrering) | 50.0% |
| 34g | manitoba mel | 50.0% |
| 34g | fuldkorns hvedemel | 50.0% |
| 68g | vand | 100.0% |
Dejen bliver lavet med 20% fuldkornshvede. Jeg gør dette med de fleste af mine brødopskrifter, for at få ekstra smag og tekstur.
Tangzhongen er 20% af hele brødets vægt. Man kan gøre det helt op til 40% som jeg helt klart vil eksperimentere med i fremtiden.
| Vægt | Ingrediens | Bagerens procent |
|---|---|---|
| 546g | manitoba mel | 70.8% |
| 172g | fuldkorns hvedemel | 22.3% |
| 378g | vand | 49.0% |
| 16g | salt | 2.1% |
| 53g | Tangzhong mel | 6.9% |
| 265g | Tangzhong vand | 34.4% |
Hvis du har lyst til at ændre formlen kan du gøre det i min brødberegner. Hvis du gerne vil have formlen til brødet før konvertering til tangzhong, så du kan ændre hvor mange procent tangzhong der er kan du gøre det med denne formel.
Konklusionen på denne surdejsbrød med høj hydrering opskrift
Det er ikke engang løgn. At lave en del af dit mels stivelsesmolekyler til gelé hjælper med at få en dej der er utroligt meget nemmere at arbejde med, selv ved meget høj hydrering.
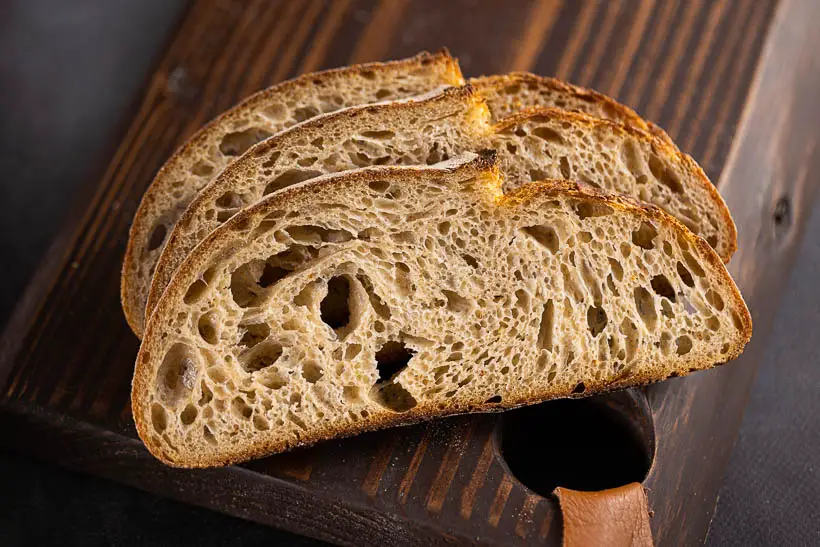
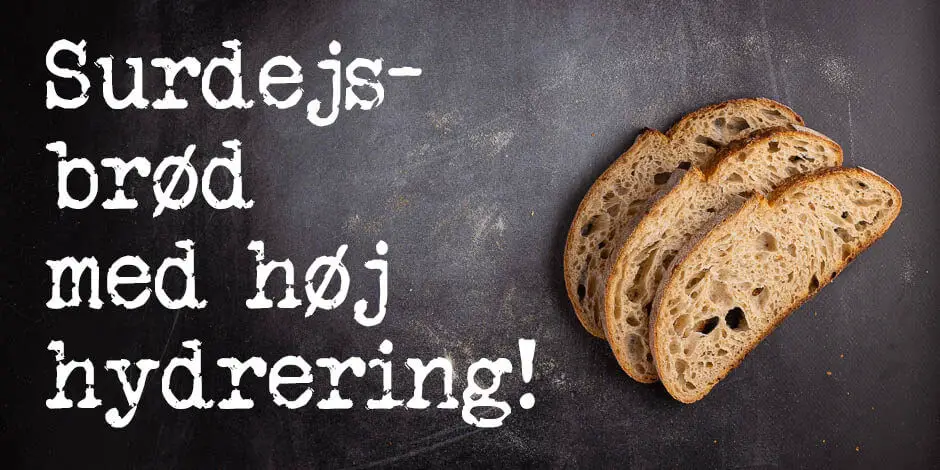
Selve brødet er vidunderligt. Åben krumme, sprød skorpe, fantastisk oven spring, berusende duft og en fantastisk smag.
Det er helt sikkert ikke sidste gang jeg bruger denne metod til at lave surdejsbrød.
Del gerne på sociale medier
Dette er min opskrift på et surdejsbrød med høj hydrering med tangzhong metoden. Jeg håber du vil prøve at lave det, for det er fantastisk.
Hvis du laver det og poster det på Instagram så tag mig med @foodgeek.dk så jeg kan se det. Det vil gøre mig rigtigt glad.
Tangzhong Surdejsbrød
Ingredienser
Fordej
- 40 g surdej
- 40 g manitoba mel
- 40 g fuldkorns hvedemel
- 80 g vand
Tangzhong
- 53 g manitoba mel
- 266 g vand
Dej
- 546 g manitoba mel
- 172 g fuldkorns hvedemel
- 377 g vand
- 170 g fordej
- 16 g salt
Sådan gør du
Make tangzhong
- Mix 53g bread flour and 266g water using a whisk.
- Microwave on high until the mixture is above 65°C/149°F. It tooks about 1.5 minutes in my 1000W microwave.
- Mix again using a whisk and leave to come down to at least 30°C/86°F.
Mix the levain
- Add 40g sourdough starter, 40g bread flour, 40g whole-grain wheat flour and 80g water to a tall glass container with straight sides.
- Mix it well.
- Add an elastic band around the container, so you can monitor the growth.
- Leave to ferment somewhere warm, preferably in a proofer set to 30°C/86°F until grown to its peak.
Autolyse
- Add 543g bread flour, 172g whole-grain wheat flour, and 16g salt to a large bowl.
- Mix it with your hands so it's completely combined.
- Add 377g of water to the bowl.
- Tilføj den afkølede tangzhong.
- Incorporate all the water into the flour mixture. First I mix with my fingers, when it becomes too thick I start lifting the dough up from the sides into the middle. Keep going until there's no dry flour left.
- Leave on the kitchen counter until the levain has peaked.
Mix the dough
- Add 170g of the levain on top of the autolysed flour.
- Dimple the starter into the dough and push your fingers through the dough like scissors.
- Then start folding the dough until you feel like the starter has been completely incorporated. I usually got for about 5 minutes.
- Let the dough rest under a damp dishtowel for 30 minutes
Bulk fermentation
- We start the bulk fermentation with three sets of coil folds spaced out by 30 minutes.
- To do a coil fold do the following:
- Wet your hands.
- Loosen the dough carefully from the bowl. You probably only need to do that the first time.
- Put two fingers in from each side of the dough.
- Lift up the dough so that the part of the dough facing away from your is loosened.
- Flip that part of the dough underneath the dough.
- Flip the bowl 180°.
- Lift the dough again and flip the other end of the dough underneath.
- Now turn the bowl 90°.
- Repeat the steps from above.
- Leave the dough to rest 30 minutes under a damp dish towel.
- After the 3rd coil fold you should check the gluten development by doing a windowpane test.
- If it's still not strong add more coil foldes as needed.
- When you are done with this part, add the dough to a bulking container with straight sides.
- Mark the top of the dough on the container with a whiteboard marker.
- Let it grow 50% covered somewhere warm.
Divide and preshape
- When the dough has fermented and seem fluffy, light and airy you should divide and preshape the dough.
- Divide the dough in half using a bench scraper.
- Preshape the dough by making a round.
- Pull out the side of the dough ball and fold it over the top of the dough, continue doing the same from each side so you've done it from the top, bottom, left and right.
- Flip the dough over using your bench scraper.
- Put the scraper behind the dough and pull it towards you do that the top is being pulled underneath the dough thus tightening the top.
- Once you can't get any further, put the scraper in front of the dough and push it across the table doing a twisting motion at the end so the scraper ends up behind the dough.
- Repeat a few more times until you have an approximate ball.
- Repeat for the other dough ball.
- Rest for 20 minutes on the kitchen counter
Shaping
- We're baking these breads as batards, also known as cigar shaped or oval loaves.
- Flour two oval bannetons with a generous amount of rice flour.
- To shape the dough do the following.
- Flour your kitchen counter lightly.
- Flip a dough ball onto the flour.
- Tease it into a rectangle using your fingers.
- Pull out one side and fold it in over the fough above half way.
- Pull out the other side and cover the other flap.
- Then roll the dough up pretty tightly, from the short end. I usually pull and and press down with my pinkies. Watch the video how it's done.
- You should end up with the stitch of the loaf being down towards the table.
- You will have a oval loaf, but with rolls on the sides.
- Cover the rolls put pulling the dough down over the roll in each side.
- Flip the dough into a banneton so that the stitch is upwards.
- Repeat with the other bread.
- Put both bannetons in plastic bags and put them into the fridge to retard until you want to bake. At least 8 hours but up to 36 should be fine as long as your fridge is really cold.
Baking the bread
- Put a dutch oven or combo cooker in the oven on top of a baking stone or baking steel,
- Heat your oven to 260°C/500°F/Gas mark 10 for one hour.
- Grab a banneton from the fridge and flip it out onto a peel with a piece of parchment paper on it.
- At this point you can add more rice flour to the top, depending on the look that you want.
- Score the bread using a super sharp lame. For this one I usually do an ear.
- Hold the lame at a 45 degree angle, and cut swiftly and decisively from one end of the bread to the other, it should be about in a 45 degree angle on the bread too.
- Don't be afraid to slice more than once to make the score deeper as needed.
- Bake the bread with the lid on for 20 minutes.
- Remove the lid and turn down the oven to 230°C/450°/Gas mark 9.
- Bake for an additional 20-25 minutes until the bread is super crispy and deeply caramelized.
- Take the bread out and put onto a wire rack.
- Reheat the oven to 260°C/500°F/Gas mark 10 and bake the other bread.
- Let them cool completely until you cut into them.




Er der en grund til at du blander saltet i ved autolysen?
Det er nemmere end at gøre det senere 🙂