

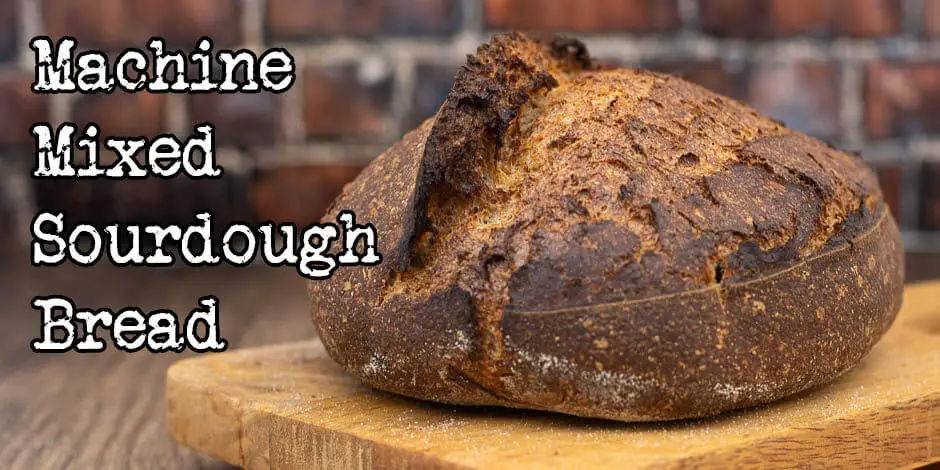

So you love the taste, feel, smell, and texture of homemade sourdough bread, but you just think it’s too complicated? Autolyse, kneading, folding, and a whole bunch of other things. Well, here comes the Foodgeek to the rescue. This is my recipe for stand mixer sourdough bread.
So these last couple of years, sourdough bread has been all the craze. People love to eat them, but there’s a growing interest in making them yourself.
The problem is that most recipes are more complicated, mine included.
For the person that wants fantastic bread with a minimal amount of effort, I’ve developed this method that only requires you to mix the dough, ferment it, shape it and then bake it.
If you are just here for the recipe, you can press the button underneath to be automagically transported to the recipe:
Jump to Recipe Jump to VideoThe dough in this sourdough bread stand mixer recipe
Vitals
| Total weight | 1400 grams |
| Pre-fermented flour | 9.1% |
| Hydration | 75.0% |
| Yield | 2 small loaves |
The dough
The dough is a pretty standard dough for sourdough bread. What differs here is mainly the method.
The flour is 80% high-protein bread flour and 20% whole-grain rye flour.
The hydration is 75%. That’s a bit higher than some flours can take, so in the method, I give you the numbers to make it 70%.
If it’s the first time you make this bread or the first time you use the flour you are using, start at 70% and if it seems dry, work your way up.
The inoculation, which means the amount of starter compared to the amount of flour, is 20%. This is a good amount for fermenting at room temperature. 22-24°C/72-75°F. If your room is a lot colder, increase this percentage. If your room is a lot warmer, lower this percentage.
You can use my bread calculator to change the inoculation.
The salt is 2%. This does seem like a lot of salt, but remember this is for the entire bread, so each slice won’t have very much salt in it.
| Weight | Ingredient | Baker's Percentage |
|---|---|---|
| 576g | bread flour | 80% |
| 144g | whole grain rye flour | 20% |
| 522g | water | 72.5% |
| 144g | starter (100% hydration) | 20% |
| 14g | salt | 1.9% |
If you want to change the quantity, the size, the hydration, or the inoculation, it can be done here in my Bread Calculator.
The conclusion for this stand mixer sourdough bread recipe
So, there is no doubt that this method makes it a lot easier to make sourdough bread.
The gluten development that you get from mixing your dough on a machine is also very, very good.
It takes a lot of manual labor to get the same amount of gluten development when kneading or folding. Great gluten development is one of the essential factors in getting a great oven spring.
Taste-wise, it’s super delicious. I love the taste that rye gives when mixed with wheat. If you have another whole grain you adore, you can substitute the rye.
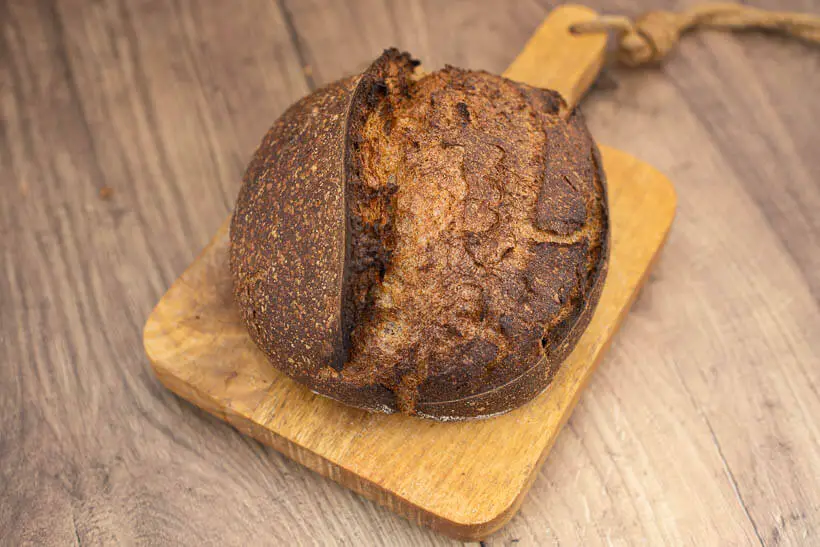
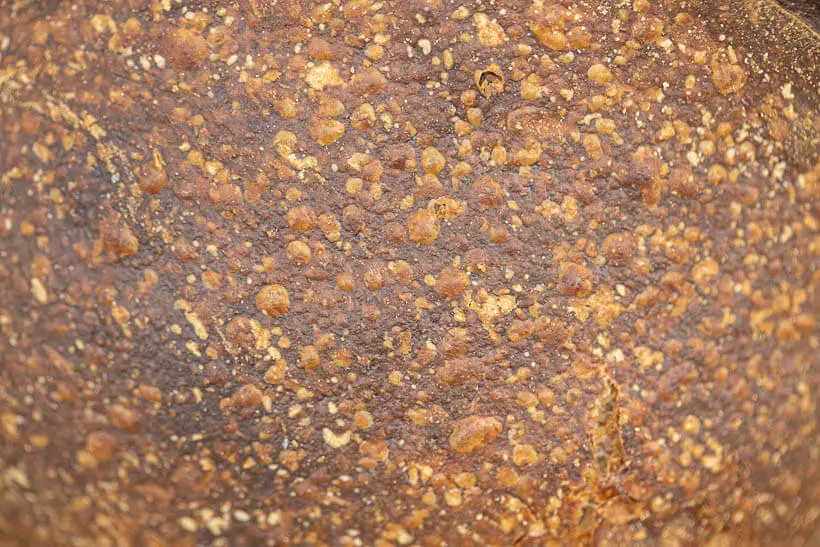
The crust is super crispy, and the crumb is gorgeous and open. I don’t know what more I’d want from bread.

Please share this recipe for this stand mixer sourdough bread recipe
This is my recipe for sourdough bread made in a stand mixer. If you like the recipe, please consider sharing it with like-minded bread lovers on social media.
If you make it and post it on Instagram, please tag me as @foodgeek.dk so I can see it. That would make me very happy.
Machine Mixed Sourdough Bread
Ingredients
- 576 g bread flour
- 144 g dark rye flour
- 522 g water, divided room temperature
- 144 g sourdough starter
- 14 g salt
Instructions
Mix the dough
- To the bowl of your stand mixer add: 576g bread flour, 144g rye flour, and 14g fine salt
- Mix with the paddle attachment until all everything has been mixed together
- Then add 144g sourdough starter that has grown to its peak.
- Then add 482g room temperature water for 70% hydration.
- Mix the dough until it comes together. If you feel like the dough is too dry, add up to 40g water to get to 75% hydration.
- Switch the paddle for the dough hook.
- Mix for about 5 minutes. The dough should start to let go of the sides of the bowl, but if it doesn't stop after 5 minutes. I used speed three on my KitchenAid Artisan XL mixer.
- Then test the dough for a windowpane. If it doesn’t occur first, mix 2 more minutes and then check again. Repeat until you get a good windowpane.
Ferment the dough
- Then put your dough in a see-through bulking container. Level the top of the dough. Put a line on the container with a whiteboard marker. Cover it and put it somewhere warm.
- I use my proofer set to 30°C/86°F. Let the dough grow by about 25%. It took about 3 hours, but please only use that as a guideline. The volumetric growth is what is important.
Shape the dough
- Then divide the dough into two and pre-shape them. Watch the video to see how it's done.
- After the pre-shaping, let the dough rest on the counter for 20 minutes.
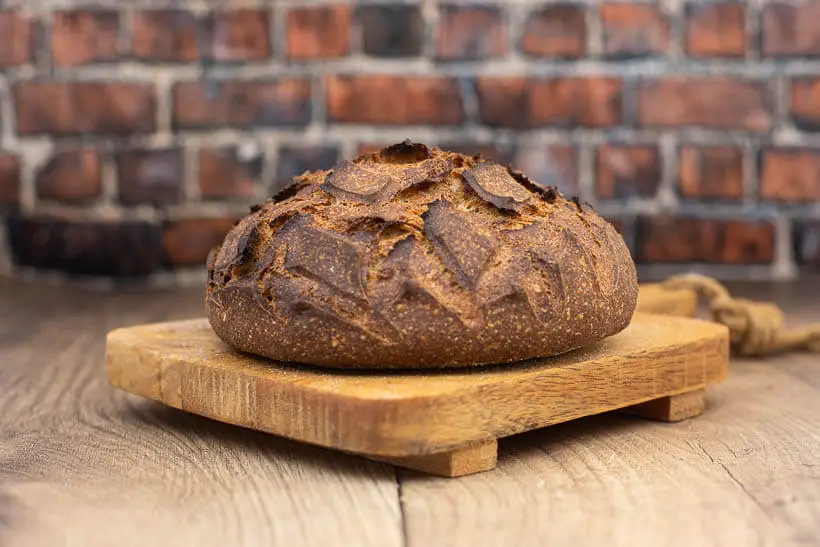
- When the 20 minutes are up, do the final shaping. I shape one as a boule and one as a batard. Also, watch the video to see how to do the final shaping.
- Once they are shaped, put them into bannetons.
Retard the dough
- Put the loaves in the fridge for the retard, a final cold-proof.
- Let them rest for at least 8 hours and up to 48 hours.
Bake the dough
- When ready to bake, heat your oven to 260°C/500°F with a baking steel/baking stone and a dutch oven inside.
- Once the oven has heated for about an hour, I grab one of the doughs from the fridge.
- Dust the bottom of the dough with rice flour so it can easily slide off the peel when you put it in the oven.
- Then flip the dough onto the peel. Score the dough with a razor blade attached to a lame.
- Grab the peel with the dough and put the dough inside the scorching hot dutch oven, and bake for 20 minutes.
- When the 20 minutes are up, remove the lid of the dutch oven and reveal the bread.
- Then I turn down the oven to 230°C/450°F and bake for another 20 minutes. I may take the bread out a bit earlier, depending on how it’s looking.
- When it’s finished, grab the bread and put it on a wire rack to let it cool.
- Then turn the oven back up to 260°C/500°F and bake the other bread.
- Let them cool completely before cutting into it, or else your bread may stale more quickly.


Hi Sune,
I’m so glad you have made this bread using a machine. The results look great. Questions: (1) What speed did you use with the Kitchenaid; (2) approx. how long was the mixing to develop a good windowpane; (3) what was the temp of the water; (4) how long did it take to proof at 30 deg?
Again, I don’t know why this type of recipe hasn’t been done before. How many stretch and folds, overproofing/underproofing, has enough strength been developed…these don’t really factor as this is now so simple. Well done and thankyou!
Thank you for your kind words.
I updated the recipe to reflect these answers:
Hi Sune,
This is in response to the extra information regarding using machine for gluten development. Made the bread (sent email with picture). Looks good, but have to see the crumb. It took ~15 mins speed 3 to develop good window pane, but I don’t have the spiral dough hook with my Kitchenaid and I went for 75% hydration. I think what is important is the 25% rise, no more, and it took ~3 hours in the proofer at 30degC. The recipe worked well, so much easier than traditional, but still have to taste and check crumb.
I have some questions about your starter regime. You do like to challenge sour bread dogma! Ok. Normally I keep my starter in the fridge, a thick slurry, 1:1:1 using organic rye. Reading your articles, I made a 1:2:2 starter using 40g of my starter and organic rye, incubated at 28deg, after 5 hours it had more than doubled. I used 144g for your machine recipe. Now for the starter questions. I have ~40g of starter left. Do I just keep that remainder at 28deg, and when I want to make bread in 3 days time, I’ll just mix the starter and any liquid that has formed, and then add flour and water equal to the weight/volume for the starter required in my next bake e.g. another 80g flour and water. 1:2:2 and I will have 144g for the next machine mix and a remainder to keep the cycle going. Is this the correct routine?
Kind regards,
Marija.
I have a KA 6qt Professional and it took my dough about 20 minutes to pull a windowpane which is way longer than you stated below (5 minutes). Can you give some more insight into this?
It sounds like it may be the flour you are using. If you mix by hand how easy is it to get a windowpane?
I am using KABF and Sunrise Rye. My starter is Tartine method 50/50 white BF and whole wheat. I have had great success with this mix. It’s just the machine mixing is not working for me.
I have the same issue and also looking for suggestions. Kitchen Aid says not to higher than speed 2. After 10 minutes I still wasn’t close to passing the windowpane test. I am using King Arthur breads flour with the same 50/50 starter. I’m new to using the mixer so I look forward to figuring this out. I don’t want to over mix or heat the dough. Any help is appreciated.
In that case stop if the dough looks nice and cohesive, when you get to the shaping I am sure it will be fine.
Hi
Step 4 of Mix the Dough says to use 482g water for 70% hydration. But 482/720 = 66.9%
Is this a typo? Or have I missed something…?
Thanks!
When you factor the flour and water into the starter it will be 70% 🙂
All the advertisements now on your site it ruining it! They are just over whelming all your great work.
Hello,
I’m avid follower of you. Great channel, lot of value!
Question, why you skip the autolyze step in this recipe?
Can you clarify if the recipe is for one or two loaves. The nutrition facts (and your sourdough calculator) suggests a 700g loaf, whereas in your video you divide the dough for two loaves. Does the video imply 350g loaves? or a single 700g loaf? Thanks!
Can you explain why you suggest only a 25% bulk ferment rise?
Well, it works at 25-50%, but the retard will even this out and it means less people will get over proofed bread 🙂
I was having trouble mixing the dough for this recipe in my Aucma stand mixer, and overdid it the first time which resulted in a gloopy mess that I had to throw out. You’re right about being careful about how much time to let the stand mixer go on. I read somewhere that adding liquid ingredients to the bottom of the bowl helps the dough clean off the bowl faster, and tried that. Lo and behold, my dough came together in less than 2 minutes with just the paddle attachment. I prefer to finish the dough with the slap and fold method by hand, as I’m afraid of over kneading it again. But even the slap and fold barely takes 5 mins for a good window pane test.
The rest of the steps were really easy to follow, and resulted in delicious bread with a gorgeous oven spring. I’ve sometimes made just one big loaf of bread instead of two with this recipe, and it turned out just fine. Had to extend the post-lid baking time though to wait for color instead of time. Can you please add a bit of advice about how to adjust baking times for one big loaf instead of two?
Thank you so much for this recipe, this is now my go to for sourdough bread! I’ve made it six times now and it’s resulted in great tasting bread each time!
could you use this recipe to make one larger loaf, rather than two smaller ones?
Absolutely. You may want to check the internal temperature after the 45 minutes are up. If it’s 99C/210F it’s good. Otherwise add a bit of baking time.
Hi there! Love your videos. They are very instructional. I have an ankarsrum mixer but have been thinking about the varilux bear. Your thoughts?
Unfortunately I don’t know that one. I use a KitchenAid Artisan XL (called Professional in the States) 🙂
I had really lost my way. I was very confused. I decided to use your recipe for a mixture in my Ankrasum mixer. I followed the instructions exactly and was rewarded with a beautiful bread. I would love to know if I can do your recipe for muesli bread in the Ankrasum. I love stretching and folding and making bread the old fashion way, but I am a working professional and I don’t always have time.
Yes, I don’t see why that couldn’t work. Give it a shot 🙂
What should be the inoculation and proofing time in really hot countries say 30-32°c
5-10% I’d say. If it’s humid you may want to lower the hydration too.
The time I cannot say, but just go by the rise.
I finally achieve the exact wonderful sandwich bread.
https://docs.google.com/spreadsheets/d/1nOZga71bXBowBUOY9x65u5hxdXqL8Z6_Fgn9PghPPt4/edit?usp=sharing
I have made your master formula many times and love it! I was excited to try the stand mixer version because I have the same model as you. I increased the hydration to 75% and after over 35 minutes of “kneeding” with the dough hook I still had a wet mess that never came together. I pulled it out and resorted to the tried and true slap and folds to my dough in shape. Any idea why the dough hook never brought the dough together?
35 minutes? It takes me about 5-7 minutes for the gluten to fully develop.
At 75% hydration, what is the consistency of the dough? It may just be too much for the flour that you use.
Hi Sune, in the video u said cold retard for 8-24hrs but in text above it says 8-48hrs. Have u tried to bake one that has cold retarded for more than 24hrs?
As long as your fridge is below 4C/39F, I’ve done 72 hours with no problem 🙂
Do you have a Baking Steel and a Challenger Bread Pan in the oven? It looks like you have a Baking Steel right under the bread pan on the same shelf. Is that right?
I’ve stopped using a baking steel unless I bake uncovered. It just seems to add extra time to heating when baking in a dutch oven 🙂
What size Banneton are you using for these two smaller loafs? It looks like it might be a 7″ / 18cm round one?
These are the size bannetons is use:
Oval: https://fdgk.net/buy-oval-proofing-baskets
Round: https://fdgk.net/buy-small-round-proofing-baskets
Hi there! Thanks for sharing the recipe!
I keep having this problem where past approx 5mins my dough is sticking more and more to the walls of the mixer and starts to almost melt and pool towards the bottom of the bowl. Could there be a reason for this?
I’m using 580g plain white bread flour, 11g salt, 200g starter and 330g water.
Thanks so much! I followed your mixing schedule exactly. 5mins on 2-3, then 2 min increments after that.
Thanks again,
Ewa
I think the flour you use is not very strong. Is it all-purpose flour? 🙂
Thank you very much for all your recipes and videos. It has helped me a lot along the way in my sourdough journey. I recently got a kitchen aid stand mixer and have a few questions. I mixed my dough in the kitchen aid with a dough hook on speed 2 for a total of 10 minutes checking the windowpane test every few minutes. I never got it to pass the windowpane even after a full 10 minutes. The dough seemed stuck to the bottom of the bowl and the hook only partially mixing the center of the dough. Kitchen aid recommends not going past speed 2 for dough. Prior to knowing this I used a faster speed for pizza dough. Using speed 6 the dough balled up together around the dough hook and passed the windowpane test. Everything I read online suggests mixing times around 4-8 minutes but that isn’t giving me the desired results. Do I just need to let the dough rest and come back to mix it more or do stretch and fold my hand after mixing? Any suggestions would be greatly appreciate!
By the way the loaf still came out amazing and I’ll be using many more of your recipes.
Hi Sune,
This recipe was amazing! I love baking sourdough but the mixing really hurts my hands. I love this method and it allows me to bake during the workweek as well. I mix for about 5 min on speed 2 of KA mixer with the dough hook, and then let it rest for 20-30 min. By then I have a windowpane without any more mixing. Last time I laminated at this step before the bulk proof and it came out beautifully! I would love to try an inclusion with this method. Have you tried? And do you have a recipe you could share? If not, at which point would you recommend mixing in the ingredients, and with what method? Thanks for all you do!
it looks so easy, my dough however is so sticky that it sticks to everything, including the metal scraper and my hands. I tried to humidity them but still really sticks. Maybe I am over fermenting…
I now have a box to ferment at 30dg but it takes over 5 hours to get 20% increase in volume and if I don’t wait that long, I get a frisbee…
It came out quite well! Thanks. I have a question, though. Why do you use room temperature water to mix, but then set the proofer at 86F? If that’s the target temperature, wouldn’t it make sense to start with warm water?
Thank you thank you thank you!!!!! I loooooveee this recipe… I’ve tried it with bread flour & all purpose (cause it’s all I had) I tried it with bread flour & wheat , bread flour and rye and all bread flour and they all came out amazing! One thing I will say is plz make sure u have a strong starter so you can have the best results… I let my machine run 20 minutes for best result. & bulk ferment mines for 8 hours! As he said what works best for you and your environment! The Rye is the best tasting for me so yea give it a go 😉☺️
Happy baking!
Awesome. I love rye, too. It’s so good 😀