


Seeds are delicious. Adding seeds to your bread is delicious, but how do you make sure they are all well dispersed throughout the bread. Using a technique called lamination will help you achieve that. This is my recipe for basic seeded sourdough bread.
It’s not the first time I publish a recipe for this seeded bread called “Bread from Skagen“. The first time was when I was just starting out in sourdough, and I had used the excellent baker Maurizio Leo’s template for making sourdough bread.
This time around this is 100% my own creation, using techniques that I’ve tested myself. Many many times. I hope it shows that this is a much simpler way of getting great results.
If you are just here for the recipe, you can press the button underneath to be automagically transported to the recipe:
Jump to Recipe Jump to VideoWhat are edible seeds?
Edible seeds are forms of seeds that are suitable for human consumption.
They are divided into four different groups:
- Cereals
- Any kind of cultivated grain: maize, wheat, rye, barley, rice, oat, sorghum, millet, triticale, and fonio are the common ones.
- Legumes
- beans, lentils, lupins, peas, and peanuts.
- (Culinary) Nuts
- True nuts
- Includes: acorn, chestnut, hazelnuts
- Drupe seeds
- almonds, apricot kernels, cashew, pistachio, walnut
- Nut-like gymnosperm/angiosperm seeds
- pine nuts, macadamia nuts, brazil nuts, peanut
- True nuts
- Spices
- Too numerous to list
They can all be added to bread. Generally, the ones listed in the cereals and legumes sections will need to be added to a soaker.
Why use a soaker in this seeded sourdough recipe?
Why do we use a soaker when adding seeds?
Well, when we put the seeds into the water they will soak up as much of the fluid as they can.
If you add unsoaked seeds to a dough, they will soak up moisture from the bread, essentially making it less hydrated.
Notice that as you add the seeds, it will seem like the dough becomes slacker. That’s because the seeds will leak out some of the moisture into the dough, but then they will soak it up again so the dough becomes the same hydration that you intended
What is lamination and why do we use it?
Lamination is a technique that is used for gluten development in high hydration doughs. It’s not the same as lamination used for pastries and croissants, although in a sense it’s done in much of the same way.
What you do is you wet your counter so the dough won’t stick, and then you pull the dough as thinly as possible.
This agitation helps the gluten develop and become strong. Making the dough super elastic and helps get an amazing oven spring.
But it also opens up an easy way to add things to your dough that becomes very well dispersed.
So if we add anything we need at the point where we have the dough stretched out to a giant “sheet”, we then fold it up. Everything is already halfway there.
All we need is a couple of folds more and we have a perfect seeded sourdough bread.
The lamination is explained in detail in the recipe, and you can also see how to do it in the companion video.
The dough in this seeded sourdough bread recipe
The vitals
| Total weight | 1400 grams |
| Pre-fermented flour | 7.0% |
| Hydration | 80.0% |
| Yield | 2 small bâtards |
The dough
| Weight | Ingredient | Baker's Percentage |
|---|---|---|
| 529g | bread flour | 80.0% |
| 132g | spelt flour | 20.0% |
| 15g | fine salt | 2.3% |
| 519g | water | 78.5% |
| 99g | sourdough starter (100% hydration) | 15.0% |
| 66g | poppy seeds | 10.0% |
| 40g | sunflower seeds | 6.1% |
If you want to change the quantity, the hydration or play around with the formula you can do it here in my Bread Calculator.
The conclusion of this seeded sourdough bread recipe
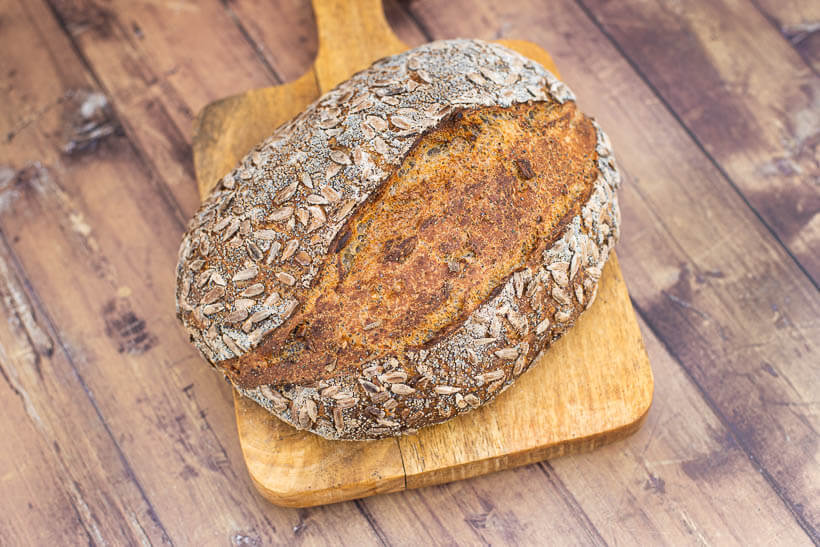
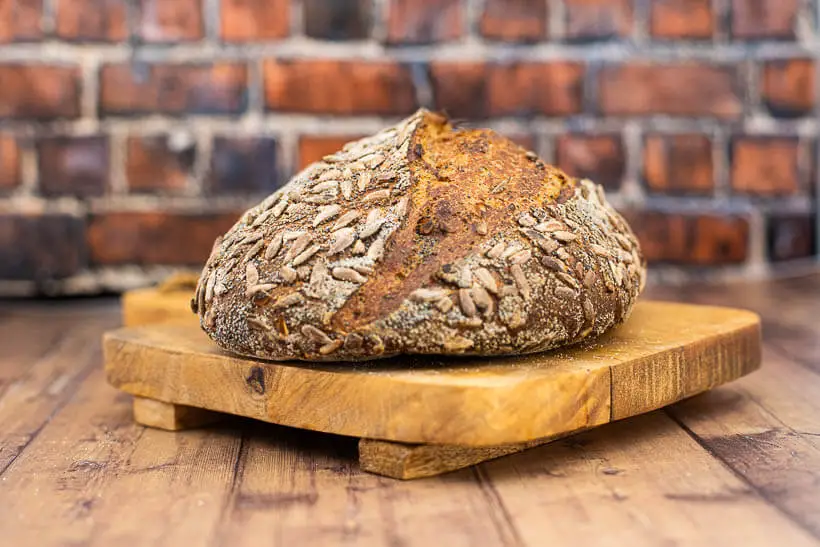
What’s better than a perfect sourdough bread? Perfect sourdough bread with the most delicious seeds.
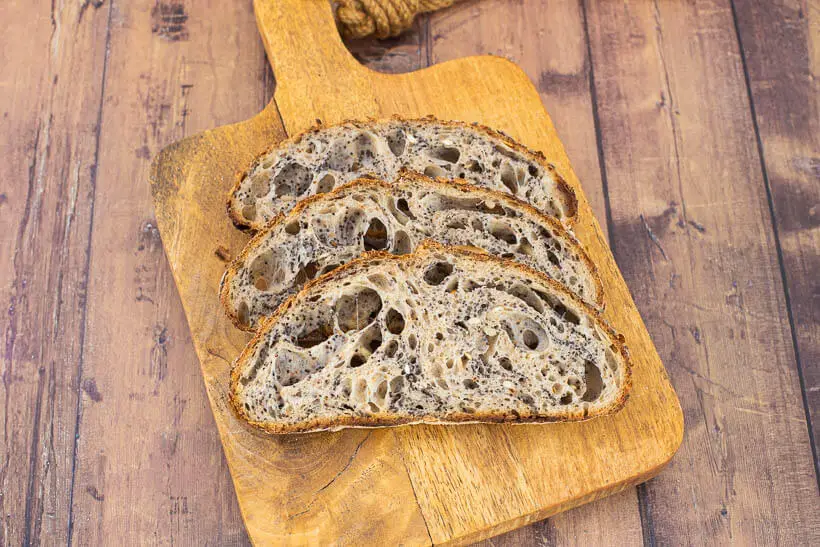
With the lamination technique, we’re assured that we get great dispersion of the seeds throughout the bread. Just have a look at this crumb shot:
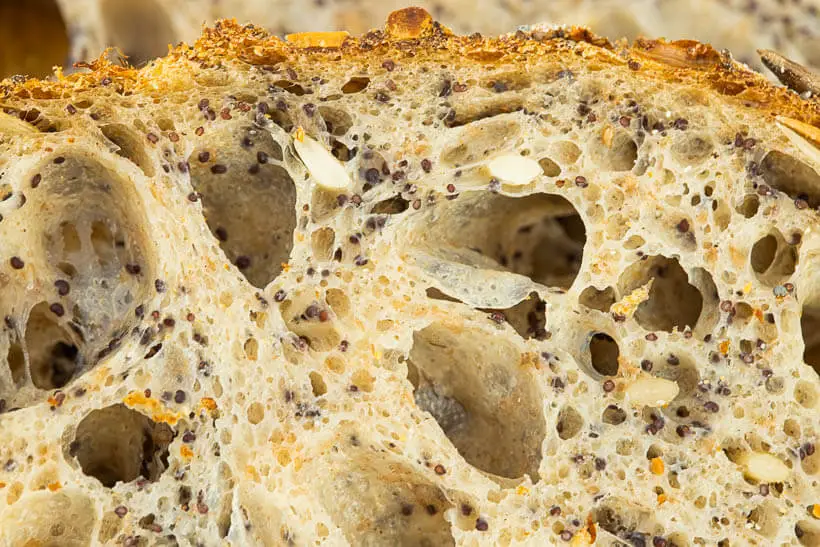
The high hydration gives a wonderfully moist crumb and with the help of careful shaping, we get a nice open crumb as well.
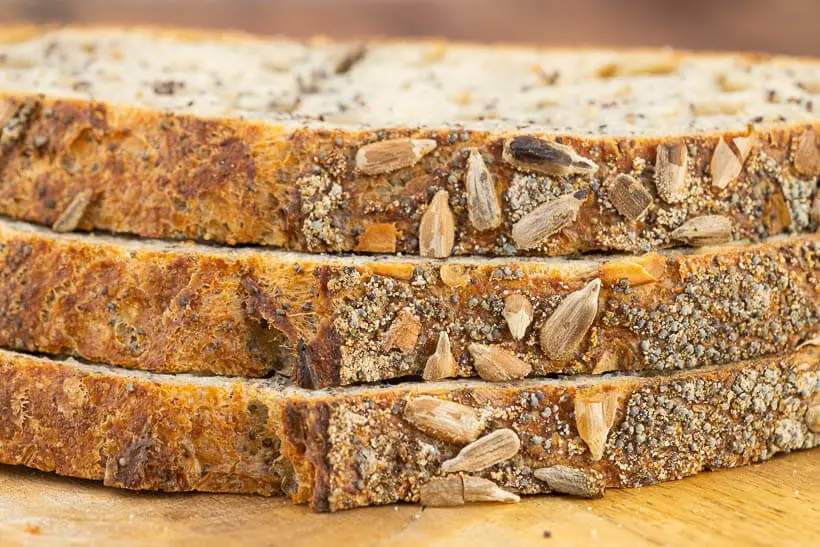
The seeds on the outside caramelize and get crispy while the bread is baking, making it an absolutely intoxicating bread.
Okay, so I love poppy and sunflower seeds, but you should use the seeds that you love the most.
Maybe you can add other things to accent the seeds. What about some lemon peel, or maybe some parmesan?
This is one of my favorite ways to eat sourdough bread. If you haven’t tried seeded sourdough bread before, give it a shot.
It’s fun to make and tastes absolutely fantastic.
Please share this recipe for seeded sourdough bread on social media
This is my recipe for seeded sourdough bread. If you like the recipe please consider sharing it with like-minded bread lovers on social media.
If you make it and post it on Instagram, please tag me as @foodgeek.dk so I can see it. That would make me very happy.
Basic Seeded Sourdough Bread
Ingredients
Dough
- 529 g bread flour
- 132 g spelt flour
- 519 g water
- 15 g fine salt
- 99 g sourdough starter fed and grown to its peak
Soaker
- 66 g poppy seeds
- 40 g sunflower seeds
Topping
- poppy seeds
- sunflower seeds
Instructions
Mix the dough
- To a bowl add: 529g bread flour, 132g whole-grain spelt flour, and 15g fine salt. Mix until it's combined.
- Add 99g sourdough starter and 519g water. Mix with your hands until all the flour is hydrated.
- Let the dough rest for 1 hour.
Prepare soaker
- To a small bowl add: 66g poppy seeds and 40g sunflower seeds.
- Add enough boiling water to cover all of the seeds.
- Put it aside until you need it.
Bulk fermentation
- Perform Two sets of stretch and folds spaced out by 30 minutes.
Lamination and adding seeds
- Strain the remaining water from the seeds through a fine-meshed sieve.
- Perform a lamination by doing the following:
- Spray your kitchen counter with water.
- Put your dough on top of the water and start pulling on the edges of the dough. You should aim for a square.
- Don't pull hard; do it little by little, then move to a place further down the edge.
- Keep going until the dough is very thin.
- Spread the seeds on the top of the dough as evenly as possible.
- Grab the right side of the dough and fold it one-third over the dough.
- Then fold the left side of the dough over the fold you just did.
- Fold the bottom third up over the dough.
- Finish the lamination by folding the dough from the top down halfway.
- Put the dough in the bulking container and mark the top of the dough. You can use a whiteboard marker, an elastic band, or maybe a post-it note. Whatever floats your boat.
- Let the dough rise by a quarter or 125% of its initial size.
Divide and preshape
- Dump the dough out unto the kitchen counter. No flour or water should be present.
- Give the dough a couple of folds to disperse the seeds completely.
- Divide the dough into two equally sized pieces.
- Take one piece and fold the sides up to the middle of the dough to make tension on the side facing the counter.
- Put the scraper behind the dough and move it forward on the table. That will pull the dough down in the front, thus creating tension on top of the dough.
- Put the scraper in front and push the dough back over the table and turn the scraper around, so it faces forward again.
- Keep going until you have a uniform and taut dough.
- Proceed with the other dough.
- Let them rest on the counter for 20 minutes.
Final shape
- Finan-shape the dough to a bâtard.
- See the video for details.
- Prepare a dish towel with poppy seeds and sunflower seeds.
- Lift the shaped dough onto the dish towel and roll it around to make all the seeds stick.
- Put the dough into a banneton, put it in a plastic bag, and put it into the fridge. The banneton does not need to be floured or have a liner.
- Let them rest in the fridge for at least 8 hours, 48 hours at the most.
Baking the bread
- Heat your oven to 260°C/500°F with a baking steel and dutch oven inside.
- When the oven is warm, grab one of the doughs from the fridge and dust the bottom with rice flour.
- Flip the dough onto a peel.
- Score the dough.
- Put the dough into the dutch oven and put the lid on.
- Bake the bread for 20 minutes.
- Open the oven and remove the lid from the dutch oven.
- Turn the oven down to 230°C/450°F.
- Bake bread for about 20 minutes until it's crunchy (and about 99°C/210°C internal temperature).
- Take the bread out and let it cool on a wire rack.
- Turn the oven up to 260°C/500°F and repeat with the other bread.


Sune, thank you so much for your amazing video tutorials. They are great for techniques & “what if”s 🙂
Would you do a video of sourdough with various inclusions – garlic & herb, basil pesto, using vegetable puree instead of water, etc. My hydration gets messed up when I try these..
Looking forward to a video. Thank you!
Regards,
Thresi from India
Hi Sune, I love the look of your seeded Sourdough, I’ll have to try this with my next batch. Have you ever tried Wheat Germ in your Sourdough bread. I make Irish Soad Bread for my husband and always put Wheat Germ in that and was wondering what it would be like in Sourdough Bread? I look forward to hearing from you soon.
Cheers
Kathie
Your seeded sourdough has completely spoiled me! After trying it, it’s hard to imagine eating sourdough without seeds. It’s incredible bread, and I thank you.
I have a question: should I soak any seed before adding it? I have poppy, flax, caraway, fennel, sesame, anise and sunflower. I can’t wait to try all of them. Also, can I toast them before soaking? If so, how long and at what temperature?
Thank you so much again for your fantastic recipes!
Thank you <3
Some need to be soaked, some doesn’t. The easy fix is to just soak them all, that way the ones that need soaking will absorb the water they need, but the others won’t be affected 🙂
Hi Sune, please tell me, why can’t you sprinkle it with flour when kneading the dough?
If you need to add flour, you should probably be using a lower hydration. Flour is different 🙂