White bread is one of those wonders of the baking world, but it seems hard to get great results at home. The bread is dense, it doesn’t get the right caramelization and it’s pretty tasteless. This bread solves all of those problems. This is my recipe for sourdough Japanese milk bread.
The Japanese aren’t traditionally bread eaters, they have limited room for fields and they have an ocean bountiful of wonderful fish, so that’s a no brainer.
During the 20th Century, the Japanese have shown themselves to be masters of being inspired by and adapting food trends from all over the world, and they always take things to the max. Think the Indian-inspired Katsu Curry, or in this case the French pain de mie.
If you are just here for the recipe, you can press the button underneath to be automagically transported to the recipe:
Jump to Recipe Jump to VideoWhat makes Japanese milk bread different?
This bread is in its essence a pain de mie type of bread. Three things set it apart:
- It’s made using a tangzhong
- The way it is shaped
- It’s leavened using a sourdough starter
What is a tangzhong?
Tangzhong is a Chinese invention. A tangzhong is essentially a roux. A mixture of flour and water is cooked until the starches in the flour gelatinize and absorb the liquid.
That makes tangzhong an almost magical ingredient for your bread. It helps both the texture and the moisture of the bread.
What makes the shaping different?
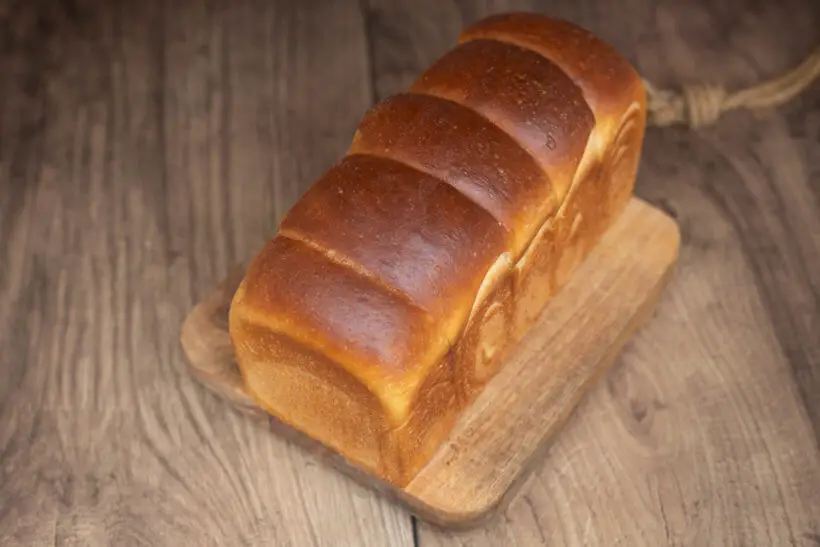
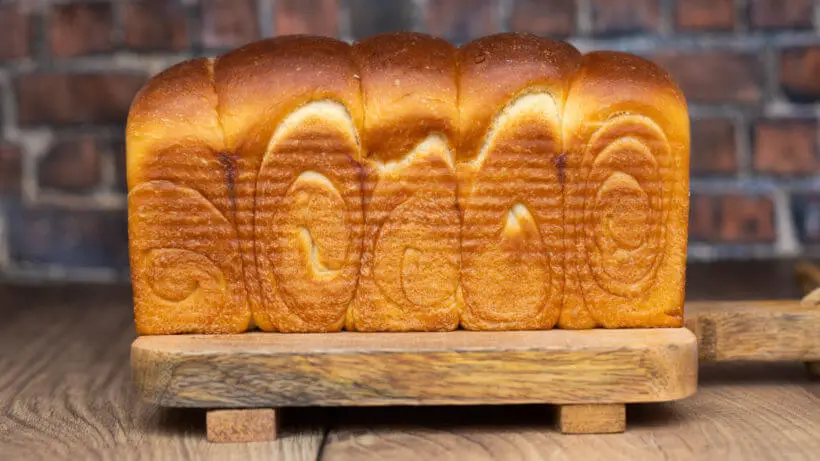
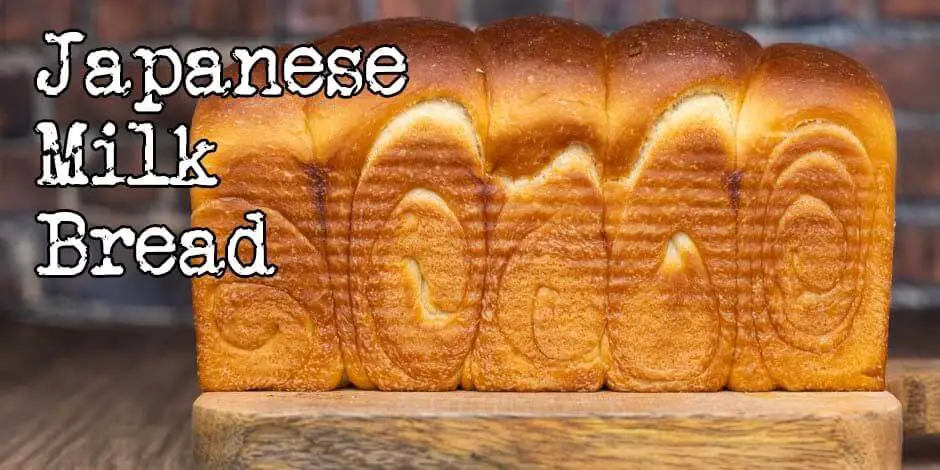
Well, the dough is shaped into rolls and all of the fermentation is done while the dough is shaped, which means that the dough expands well.
It also means that the dough has these lines running through the dough making it feel lighter.
Why does a starter make a difference?
Sourdough starter is a form of naturally occurring yeast. When you compare the concentration of yeast in a sourdough starter to commercial yeast. it is very low in the starter, which means that anything leavened with sourdough starter will rise much longer.
Longer fermentation means more flavor, not necessarily more sour flavor.
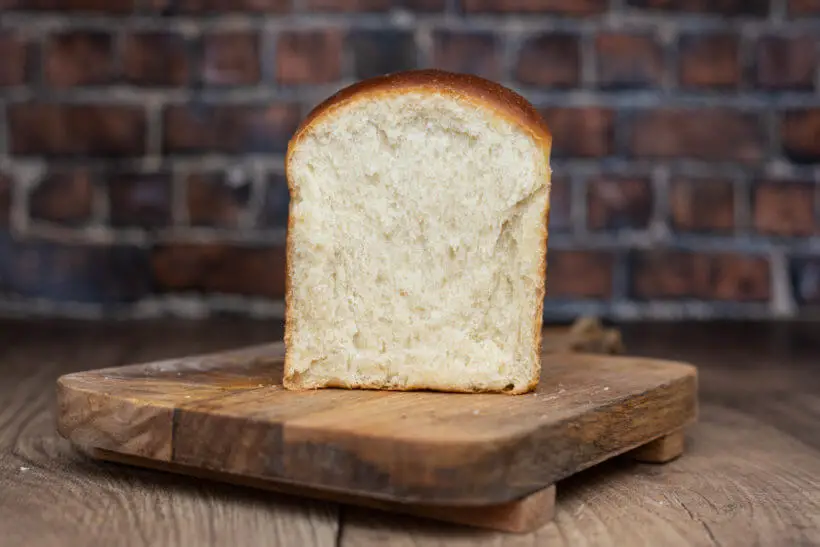
Because of its relatively high hydration, sourdough starter imparts more moisture to a dough. Even a lower hydration bread made with sourdough starter feels moister than a yeasted bread of the same hydration.
The dough composition in this Japanese milk bread recipe
Vitals
| Total weight | 1210 grams |
| Pre-fermented flour | 8.7% |
| Hydration | 69.1% |
| Yield | 1 loaf of milk bread |
The dough
As this is white bread, this dough is made with highly sifted bread flour. The dough is enriched with butter, whole milk, eggs, and sugar.
It makes it a brioche-style bread, but it is made using a tangzhong. That ensures a super moist bread.
The inoculation is 20% and the salt content is on the low end at 1.8%. If you love salt, you can easily put more in.
| Weight | Ingredient | Baker's Percentage |
|---|---|---|
| 25g | bread flour | 4.5% |
| 150g | whole milk (3.5%) | 27.3% |
| Weight | Ingredient | Baker's Percentage |
|---|---|---|
| 550g | bread flour | 100% |
| 220g | whole milk (3.5%) | 40% |
| 50g | butter, salted | 9.1% |
| 30g | sugar | 5.5% |
| 110g | starter (100% hydration) | 20% |
| 65g | egg, whole | 11.8% |
| 10g | salt | 1.8% |
If you want to play around with the formula, change quantity, hydration, inoculation, or other things, you can do so here in my Bread Calculator.
The conclusion of this sourdough Japanese milk bread recipe
This bread is dangerous. It’s addictive. Eating is just as is, or with butter is pure joy. The dark caramelized crust has a wonderful taste and the melted butter that’s brushed on gives it a ridiculously intoxicating smell.
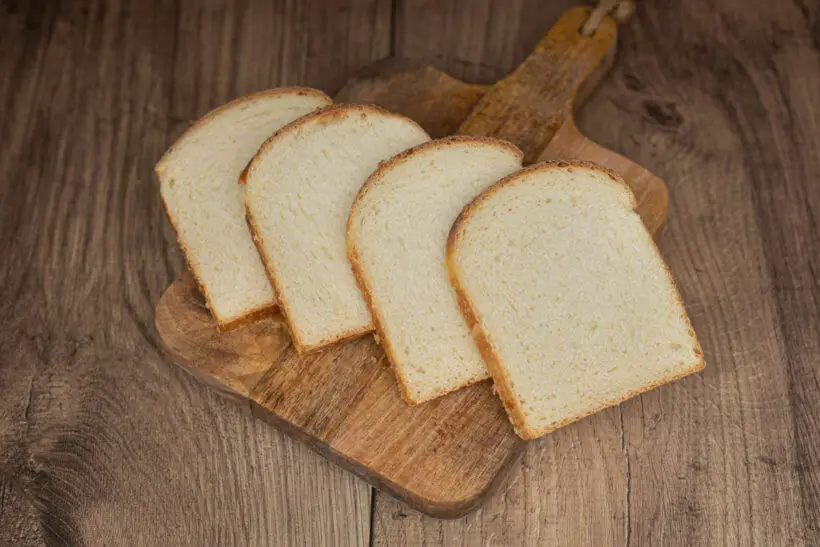
The soft and super fluffy crumb is divine and will work for any type of topping that you use on white bread. Toasting this bread makes it even better. As the toasted notes and smell of browned butter hit your nostrils. Wow!
All I can say is if you love white bread. Make this! Japanese milk bread is so good, that it will probably become illegal.
Please share this recipe for sourdough Japanese milk bread on social media
This is my recipe for sourdough Japanese milk bread. If you like the recipe, please consider sharing it with like-minded bread lovers on social media.
If you make it and post it on Instagram, please tag me as @foodgeek.dk so I can see it. That would make me very happy.
Sourdough Japanese Milk Bread
Equipment
- microwave safe bowl
- baking spray
- pasty brush
Ingredients
Tangzhong
- 25 g bread flour
- 150 g whole milk
Dough
- 550 g bread flour
- 220 g whole milk
- 50 g butter, salted
- 30 g sugar
- 110 g starter fed and grown to its peak
- 65 g egg a really big one
- 10 g salt
Egg wash
- egg
- 1 tbsp water
Topping
- 25 g butter, melted
Instructions
Preparations
- First, start by melting 50g of butter.
- Then make the tangzhong. To a microwave-safe bowl add: 150g whole milk and 25g bread flour. Mix it up.
- Put it in the microwave on full. Take the temperature once in a while; it needs to be at least 65°C/150°F.
- Then mix it until it’s completely uniform.
Make the dough
- Then it’s time to mix the dough.
- To a medium bowl add: 550g bread flour, 30g sugar and 10g salt Mix it until it’s distributed.
- Grab 220g ice cold whole milk. Add the melted butter and the tangzhong.
- Make sure the temperature is below 35°C/95°F.
- Then to the main dough add: 110g sourdough starter and 65g egg.
- Then add the milk mixture to the top of the flour. Combine all the ingredients until you have a shaggy dough.
- Then move everything to your counter and knead the dough.
- Add more flour if needed to get a tacky but not sticky dough.
Shape the dough
- Divide the dough into five equally sized pieces and shape each piece into a ball.
- Then grab a rolling pin and a dough ball, roll it into a long oval, and roll it up tightly.
- Roll that into a long strip using the rolling pin and roll it up tightly.
- Continue with all the other dough balls until you have five little rolled logs.
- Then grab a small Pullman loaf pan and spray the pan with baking spray.
- Add the five rolls of dough and cover the pan with plastic wrap.
Proof the dough
- Put the dough somewhere warm. I used my proofer set to 30°C/86°F.
- Let it ferment until it’s about 2.5 cm/1 inch from the top.
- Then turn on your oven to 180°C/350°F, or if you want, you can also put the dough in the fridge until you want to bake it. Then you should let it finish growing after you take it out.
- So put the dough back in the proofer and let it rise to about 1.25 cm/½ inch from the top of the pan.
- While waiting for the dough to finish fermenting, prepare an egg wash by combining an egg with a tablespoon of water.
Bake
- Brush the dough lightly with egg wash, and put the bread in the oven.
- Bake for about 45-50 minutes. The internal temperature should be about 95°Celsius/200°F.
- Then remove the bread from the oven, and put it on a wire rack.
- Take the bread out of the pan, and brush it with melted butter.
- Leave it to cool off.








How about buttering the pan instead of spraying with baking spray?
That works too. You may want to flour the butter after applying 🙂
Thank you for this recipe as it will be my sourdough baking project this week. I am so grateful for a recipe for milk bread using starter. I have made it using commercial yeast and I know this will be far superior. Can you explain the reason for rolling the dough balls twice into ovals? After watching your videos for a long time, I am finally going to subscribe.
Hi Sune, out of curiosity: is there a specific reason why there is only one rise moment with this bread instead of a bulk and final rise?
Yes, because it makes for the same results, but is a lot less complicated. ‘Less complicated’ should be my middle name 😉
As of today, I am behind in the count 0-2. My second attempt today turned out no better than the first try. It does not rise and there is little or no oven spring. I have followed the recipe faithfully and my starter is very healthy.
I am longing for the fluffiness and soft texture as described in the video but I am too close to striking out. Any advice?
I have endured two abject failures with this recipe. The most recent loaf just became breadcrumbs.
The first time I hand kneaded the dough and it never rose sufficiently.I assumed I had not kneaded it enough. The second attempt included machine kneading for 6 minutes but still no significant rise during a 4 hour proof.
Do I need to allow for a longer proofing time? Or, refrigerating it overnight and then proof it?
I think mine took 7 hours in a very warm proofer, so yes, you need a longer rise.
I was down in the count 0/2 and today I hit a home run. My third attempt rose and sprung in the oven for a perfectly beautiful loaf.
Thank you, Sune, for the suggestion of a longer proof time. That made all the difference.
This looks yummy, I have also seen this type of recipe as pull apart rolls which might be good for entertaining I am thinking!
Made it!! A few little changes (honey instead of sugar). Came out gorgeous and delicious!! Thank you!! Can I send you a picture??
Amazing. You can send me a picture on the contact form.
Love your videos! Tried this milk bread (after trying a much more complicated version first). I proofed in the fridge overnight and set it out to rise at room temp before baking. It didn’t rise too much but then when I baked it, it expanded like crazy and ripped at the top. What did I do wrong? Dough too wet?
Sourdough and enriched doughs proof very slowly. It sounds like you under proofed at it needed more time to rise.
Isn’t this dough about double the weight ordinarily baked in a 9 inch Pullman pan?