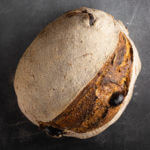
Sourdough Olive Bread
Fabulous sourdough bread with divine olives through the crumb. It's hard not to love this bread.
Servings: 2 bread
Calories: 1966kcal
Ingredients
The dough
- 704 g bread flour
- 159 g whole wheat flour
- 250 g sourdough starter fed and grown to its peak
- 616 g water
- 21 g salt
Extras
- 250 g kalamata olives
- 2 teaspoon dried basil
- 1 teaspoon dried thyme
- 1 teaspoon dried oregano
- 1 teaspoon dried rosemary
Instructions
Mix the dough
- Mix everything for the dough into a shaggy dough. Cover it, and leave it to develop the gluten for one hour.
Bulk fermentation
- At the beginning of the bulk fermentation, you should do three sets of stretch and folds every 30 minutes.
- Do a set the following way:
- Wet your hands. Grab the dough in the back of the dough, and stretch it upwards as far as it goes without breaking.
- Fold the dough down towards yourself. Turn the bowl a quarter turn and repeat.
- Do two more so that you've stretched and folded the dough from all four sides. During the second set of stretch and fold, add ¼ of the olives before doing the stretch and fold.
- Then add a quarter more of the olives for each stretch and fold until you've added all of the olives to the dough.
- After the last stretch and fold, do a windowpane test to see if the gluten development is good. If not, add one more set and then move on.
- Leave the dough covered by a damp dishtowel for 3-4 hours until it's grown 30-40%.
Dividing & pre-shaping
- Pour the dough onto your unfloured kitchen counter and divide it into two using your bench scraper. I usually weigh the dough, but you don't have to.
- Take one piece of dough and flip it over. We are going to work some strength into the surface of the dough.
- Grab the bottom of the dough (closest to you), stretch it up, and fold it halfway over the dough.
- Continue with the right side, the left side, and the top of the dough. It should resemble an envelope.
- Flip the dough over so that the part against the table is now facing up.
- Put your bench scraper behind the dough and pull it forward so that the top of the dough is drawn in under the front of the dough, thus tightening the top.
- If an olive pops out of the dough, don't push it in. Either remove it entirely or add it to the back of the dough.
- Put the scraper in the front of the dough and push forward and turn the dough so that the scraper is behind again.
- Keep going until the dough is a pretty nice ball.
- Leave both dough pieces to rest for about 20 minutes to relax the gluten.
Shaping the dough
- Flour two oval bannetons
- Put a little bit of flour on your kitchen counter. Flip a piece of the dough onto the flour.
- Put it out into a rectangle. Stretch one side out and fold it over the dough. Repeat with the other side.
- Roll the dough up tightly. Roll the seam downwards toward the table.
- Seal the ends by pulling the dough on the side down over the roll on the side
- Put the shaped bread in an oval banneton with the seam upwards and put it in a plastic bag so that the dough doesn't dry out.
- Shape the other bread.
Final proof
- Then you need to do the final proof. You can choose to bake the same day and let the dough proof on the kitchen counter, or you can put it in the fridge and do an overnight proof.
- If you let it proof on the counter, you can check if the dough is ready to bake using the poke test.
- Poke the dough lightly with your index finger. If the hole fills in quickly it needs to proof more, if the hole fills slowly and leaves a slight indentation it is ready. If the hole doesn't fill the bread is over-proofed. Bake immediately.
Baking
- Put a dutch oven or combo cooker in the oven and heat your oven to 230°C/450°F/Gas mark 8. Let it heat for half an hour.
- If you opt not to use a dutch oven or combo cooker, you must steam the bread using other methods. If you bake steamed, you should use a baking stone or steel, and you can bake both loaves simultaneously.
- Bake covered (or with steam) for 20 minutes. Remove the lid or vent the steam.
- Bake for another 25 minutes until the bread is crusty, crunchy, and has a dark caramelized crust. If the bread does not look done once the 25 minutes are up, use your baker's intuition and keep it in until it's done.
- Bake the other bread the same way.
Nutrition
Serving: 1brød | Calories: 1966kcal | Carbohydrates: 367g | Protein: 62g | Fat: 28g | Saturated Fat: 3g | Sodium: 6043mg | Fiber: 25g | Sugar: 2g